Orders & Worldwide
Orders & Worldwide

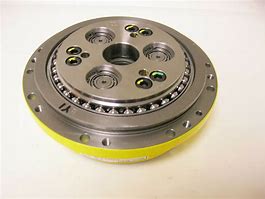
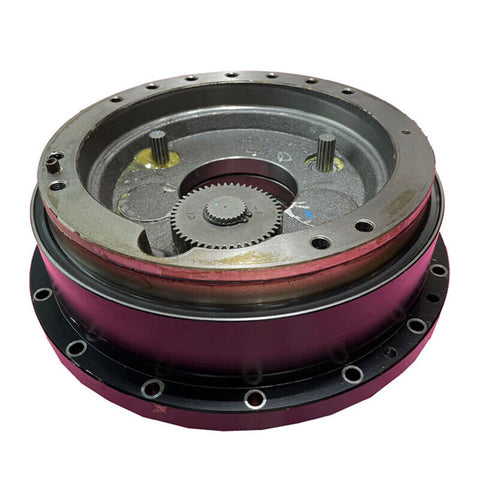
The industrial robot reducer is an independent component composed of enclosed gear transmission, worm gear transmission, and gear-worm gear transmission, which is commonly used as a speed reduction transmission device between the prime mover and the working mechanism. Its purpose is to match the speed and transmit torque between the prime mover and the working or executing mechanism. Due to factors such as prolonged usage time, poor operating environment, and lack of timely maintenance, the reducer may experience issues such as aging oil seals, worn shaft ends, worn turbines, worn transmission gears, and damaged bearings.
These issues can lead to serious problems in the robot's normal operation, such as overheating, oil leakage, abnormal noise, shaking, alarms, and jamming, which can significantly affect the robot's performance in production lines .
When inspecting the single-axis reducer, start by checking for any noticeable gaps and test the concentration of grease iron filings to see if it exceeds the standard. Assess the level of wear inside the reducer, as these issues can cause significant precision errors in the robot's operation, thereby affecting normal production on the assembly line.
Therefore, the one-axis reducer needs to be replaced. Due to limited on-site conditions, the detached upper body needs to be lifted more than 10 meters to overcome obstacles and find the dropping position. This requires precise lifting balance without any mistakes. Hence, high requirements are placed on the engineer's professional skills and practical experience.

First, ensure that the robot is in a safe mode and powered off. Use specialized lifting equipment to secure it to a suitable lifting point on the one-axis, adjusting the lifting device to keep the single-axis in a horizontal or vertical position relative to the ground, avoiding deformation or damage due to uneven forces during the lifting process. Then, following the electrical diagrams and operating manuals, systematically disassemble and label the motor cables, sensor cables, and brake lines connected to the bottom of the one-axis .
After confirming that all connectors are loosened and there are no other obstacles, prepare for lifting the upper body above the single-axis robot. Install additional lifting rings or lugs to ensure even force distribution. Carefully inspect the load-bearing capacity and safety of the lifting equipment and adjust the length of the lifting cables to achieve precise balance adjustment, separating the single-axis reducer from the upper body above it in a smooth manner.
Completely remove the bolts and other fasteners that secure the one-axis reducer to the robot's joint, and carefully remove the old reducer. Next, thoroughly clean the mounting seat of the reducer and the surrounding area from grease and impurities, and check for any wear or other damage to the mounting surface. Once the installation surface is clean and flat, follow the manufacturer's assembly instructions to accurately install the new reducer in the designated position, ensuring that key components such as bearings and sealing rings are correctly positioned and tightening the connecting bolts to the specified torque values.
Reconnect the previously detached upper body to the newly installed reducer by precisely aligning the interfaces using the lifting tools. Emphasize the importance of balancing during lifting and gradually tighten the connecting bolts while ensuring proper alignment. Continue tightening all connection bolts to the specified torque values and use a locking agent or anti-loosening measures to prevent loosening during operation.
Sequentially reconnect all the cables at the bottom of the single-axis according to the recorded positions and order, ensuring secure electrical connections. Next, inject the specified amount of lubricating grease into the newly installed one-axis reducer. The greasing process should strictly follow the manufacturer's recommended method to avoid over-lubrication or insufficient lubrication. After completion, start the robot system and perform exhaust and pressure tests according to the maintenance manual's operating procedures to ensure normal internal pressure in the reducer without any bubble formation.
After completing hardware installation and verifying proper initial testing, perform a detailed mechanical zero-point calibration and set and optimize the servo parameters of the single-axis. Utilize the built-in software or external devices provided by Fanuc Robotics to calibrate the axis's attitude angle , positioning accuracy, repeatability, and other indicators. Finally, conduct comprehensive point-by-point adjustment and functional verification within the full range to ensure accurate motion trajectory of the one-axis. Only after confirming this can the repair be declared complete, and normal production operations can be resumed.

To minimize the occurrence of faults, effective daily management and routine maintenance of the Fanuc robot one-axis reducer are essential. Here are some recommended practices:
1.Regular Inspection: Implement a scheduled inspection plan to check the condition of the one-axis reducer. This includes monitoring for oil leakage, abnormal noise, excessive vibration, and any signs of wear or damage. Inspect the reducer's components, such as seals , shafts, gears, and bearings, and address any issues promptly.
2.Lubrication: Follow the manufacturer's guidelines for lubrication intervals and methods. Use the recommended lubricants and ensure proper lubrication of the reducer. Monitor the grease level and quality regularly, and replenish or replace it as needed.
3.Cleanliness: Keep the surrounding area of the one-axis reducer clean and free from dirt, dust, and debris. Regularly remove any contaminants that could enter the reducer and cause damage. Use appropriate cleaning methods and avoid using excessive force or harsh chemicals .
4.Temperature Control: Maintain suitable operating temperatures for the one-axis reducer. Excessive heat can accelerate wear and reduce the lifespan of components. Ensure proper ventilation and cooling mechanisms are in place and functioning correctly.
5.Training and Documentation: Provide training to operators and maintenance personnel on the proper operation and maintenance of the one-axis reducer. Keep detailed records of maintenance activities, including inspections, lubrication, repairs, and component replacements. This documentation can help identify patterns or recurring issues and guide future maintenance efforts.
6.Spare Parts Management: Maintain an inventory of critical spare parts for the one-axis reducer. This ensures timely replacement of worn or damaged components and minimizes downtime. Follow recommended guidelines for spare parts storage, including proper labeling, protection from environmental factors, and regular inventory checks.
7.Collaboration with Manufacturer: Establish a line of communication with the manufacturer or authorized service provider. Seek their guidance on maintenance best practices, troubleshooting, and any specific recommendations for the one-axis reducer model used in your Fanuc robot.
By these maintenance practices and closely monitoring the single-axis reducer's condition, you can help prevent faults and ensure the reliable and efficient operation of your Fanuc robot.
0 de 3 itens selecionados
Selecione o primeiro item para comparar
Selecione o segundo item para comparar
Selecione o terceiro item para comparar
Deixe um comentário